How to Deploy a Next.js 15 App to Azure App Service -Easy Deployment Guide
Reason I wrote this Blog
When I was trying to host my Next.js 15 app on Azure App Service, I realized there weren’t many proper guides out there — most focused on older versions or other platforms like Vercel. So, I decided to figure it out myself and put everything together in one place.
In this blog, I’ll walk you through the exact steps I followed to get my app up and running on Azure. If you’re someone who prefers Azure or needs to work with it for a project, this guide is for you. No fluff — just straight-up steps, issues I faced, and how I fixed them.
🛠 Setting Up Your Next.js 15 Project
If you haven't already created your Next.js 15 app, here's how to get started:
npx create-next-app@latest my-next15-app --js --tailwind #optional --js for js --tailwind for --tailwind css installation
cd my-next15-app
This will generate a folder with all the necessary files including:
package.json: contains your project dependencies and scripts.
next.config.js: optional file for customizing Next.js behavior (you can create it manually if you need to tweak configurations).
📁 My Project Structure
Before diving into deployment, here’s a quick look at my Next.js 15 project structure. This will help you understand where things like the next.config.js, package.json, and custom server files are placed.
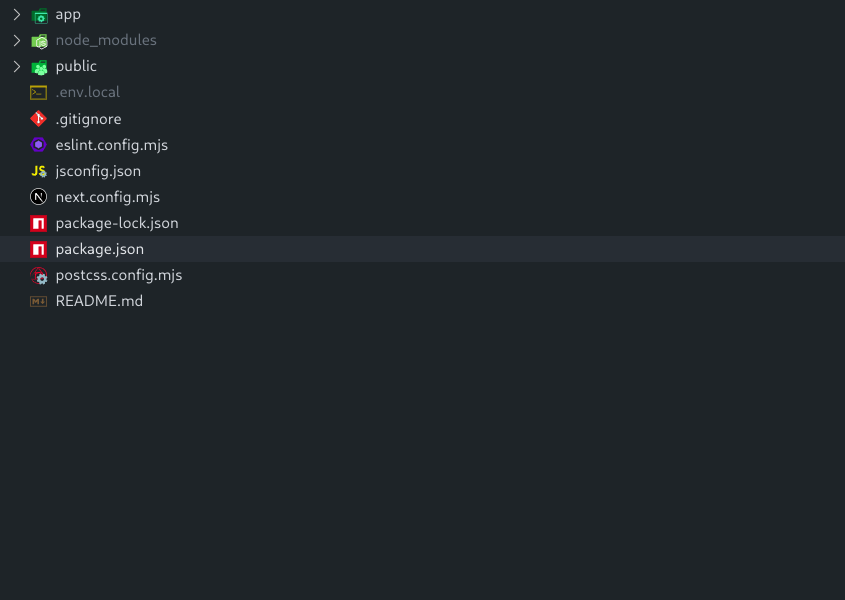
💡 Make sure your folder structure looks something like this, especially if you're using custom configurations or API routes.
Next Js config
If next.config.js isn’t there by default, just create one in the root of your project like this:
// next.config.js
/** @type {import('next').NextConfig} */
const nextConfig = {
  reactStrictMode: true, //add this
  distDir: "build", //add this
  output: "standalone", //add this
};

export default nextConfig;
My Package Json
{
  "name": "next-test",
  "version": "0.1.0",
  "private": true,
  "scripts": {
    "dev": "next dev --turbopack",
    "build": "next build",
    "start": "next start",
    "lint": "next lint"
  },
  "dependencies": {
    "react": "^19.0.0",
    "react-dom": "^19.0.0",
    "next": "15.3.2"
  },
  "devDependencies": {
    "@tailwindcss/postcss": "^4",
    "tailwindcss": "^4",
    "eslint": "^9",
    "eslint-config-next": "15.3.2",
    "@eslint/eslintrc": "^3"
  }
}
Evn Config
Create a `.env.local` file with the following configuration:
# Base URL
NEXT_PUBLIC_BASE_URL=http://localhost:3000
change
NEXTAUTH_URLwith the url given byAzureafter hosting
Upload to github
$ git add .
$ git commit -m "Add existing file"
$ git push origin YOUR_BRANCH
Why Choose Web App Over Static Web App for Next.js
-
Full SSR Capabilities: Web Apps provide complete support for Next.js server-side rendering
-
API Routes: Native handling for Next.js API routes and server components
-
Dynamic Content: Better handling of dynamic content generation on the server Runtime Flexibility
-
Node.js Version Control: Select specific Node versions (16.x, 18.x, 20.x) required by your Next.js app
-
Custom Server.js: Support for custom Next.js server configurations
-
Server Middleware: Full support for server-side middleware components Performance for Complex Apps
-
Scalable Compute Options: More powerful CPU/memory options for rendering complex pages
-
Dedicated Application Pool: Better isolation and resource allocation
-
WebSockets Support: Native WebSocket capabilities for real-time features integration Capabilities
-
Database Connectivity: Direct connections to databases without serverless constraints
-
Virtual Network Integration: Connect to private networks and backend services
-
Hybrid Connections: Link to on-premises resources securely
While Static Web Apps work well for simpler Next.js applications using primarily static generation, Web Apps are the superior choice for full-featured Next.js applications that leverage server-side rendering, API routes, and dynamic content generation.
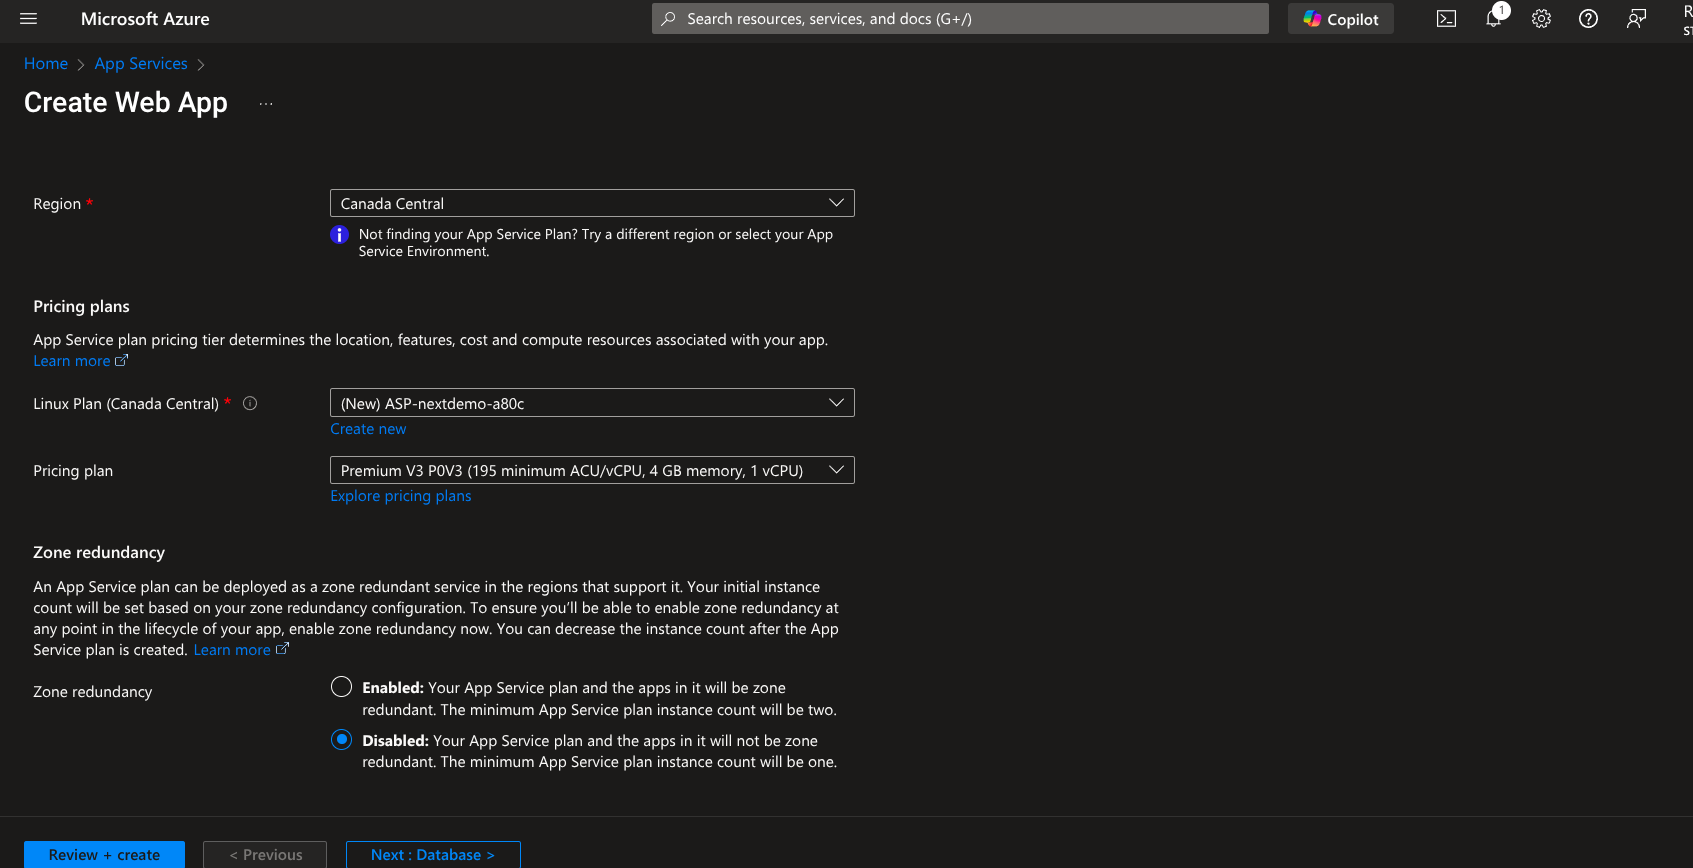
Steps To Create App Service
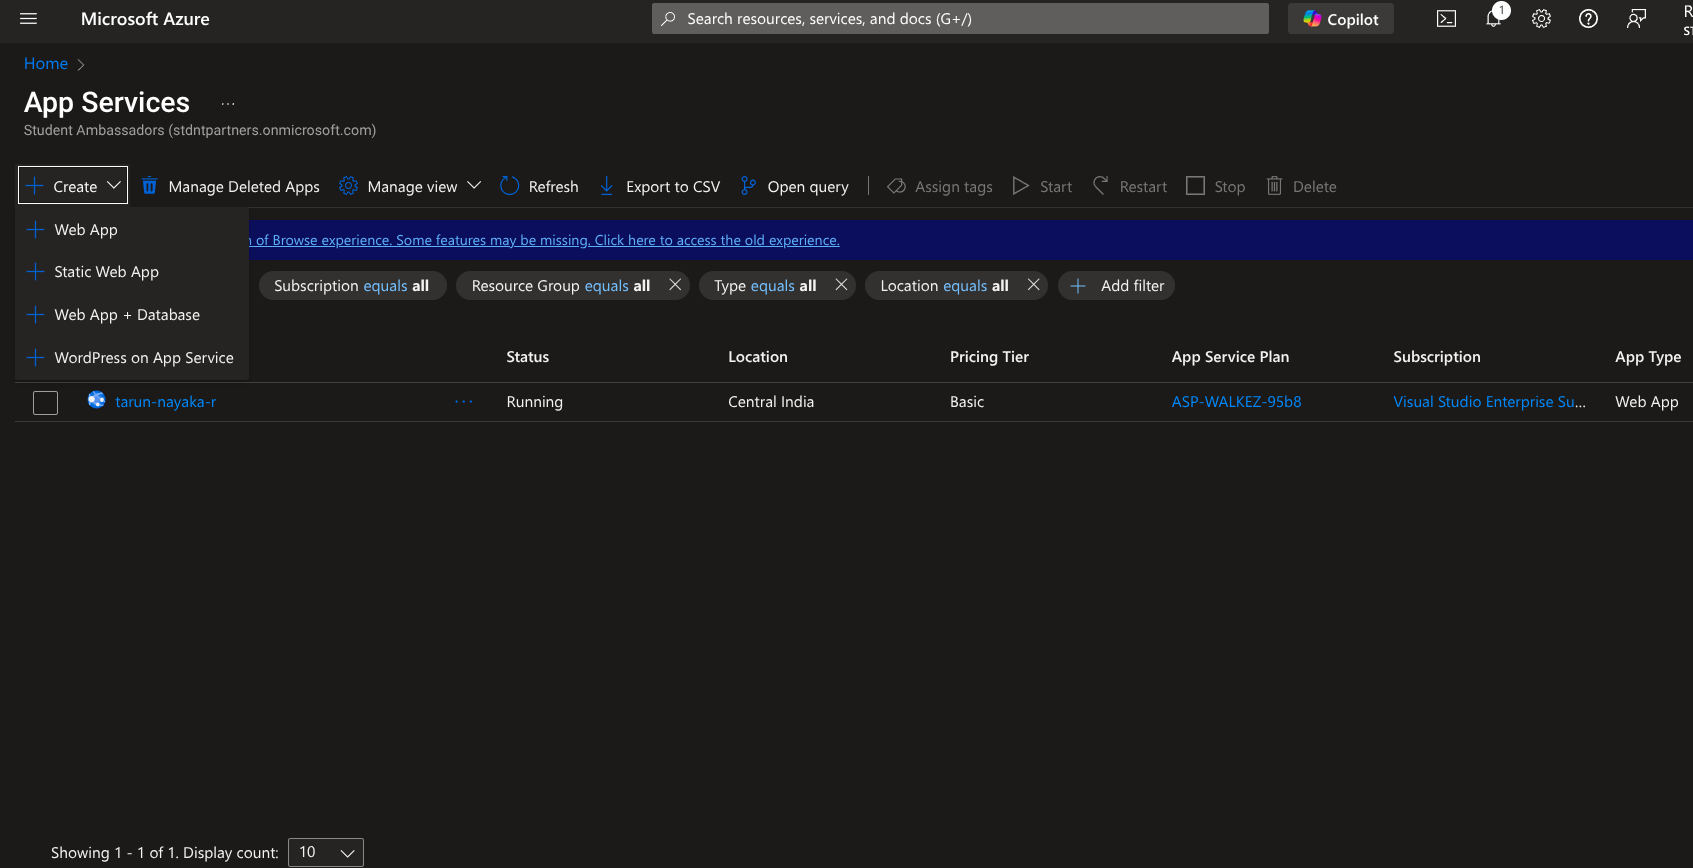
Click Web App

Connect your GitHub Account to Azure
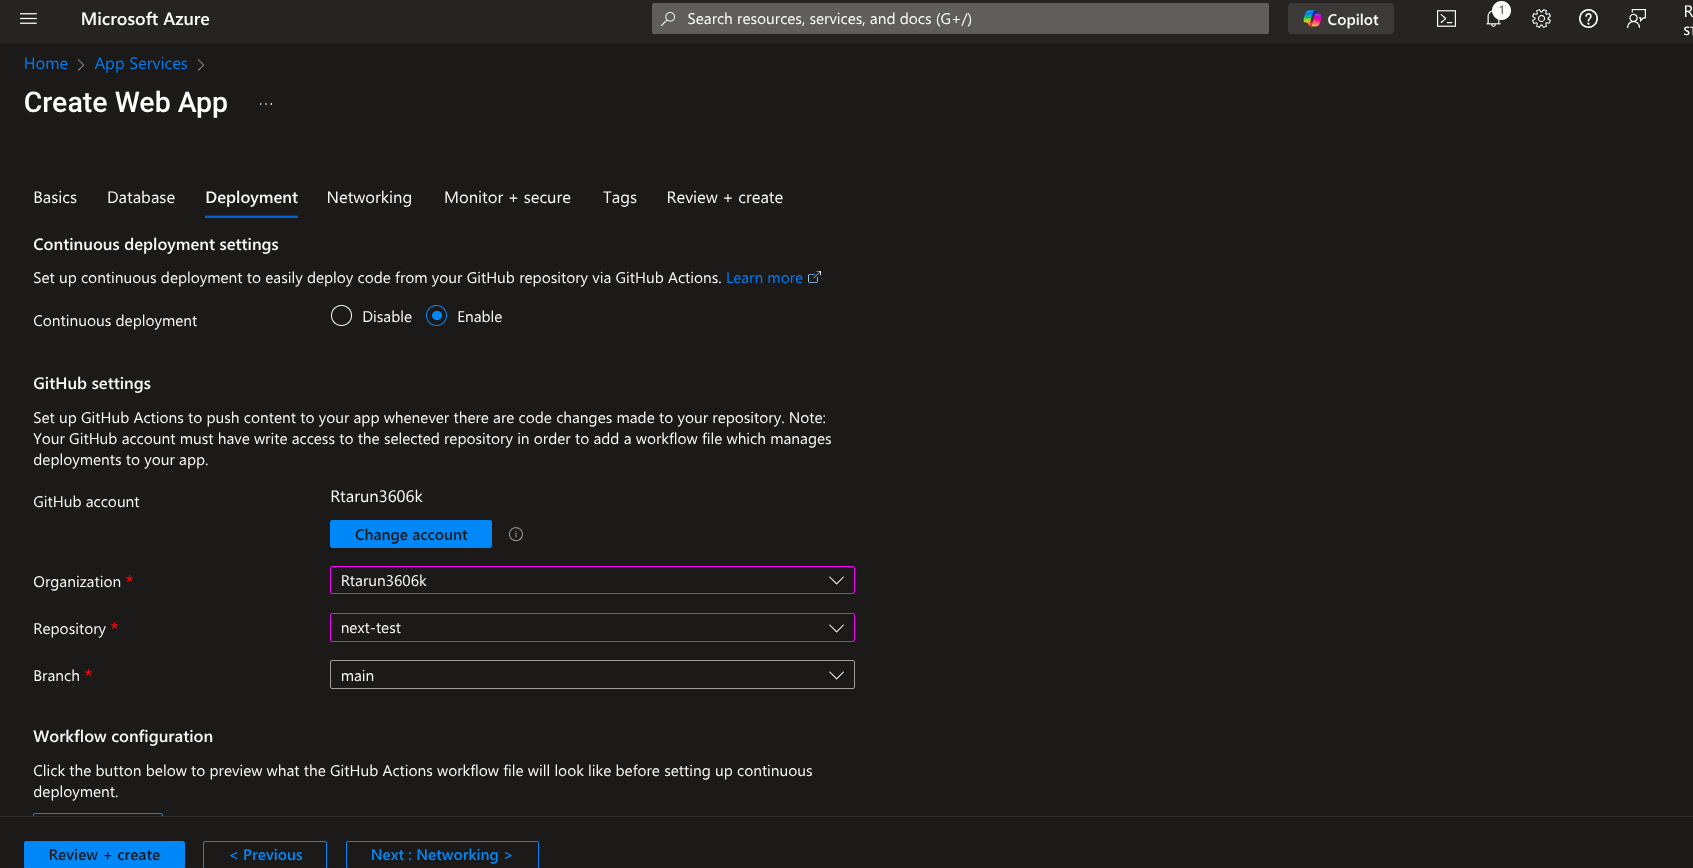
Enable Basic authentication
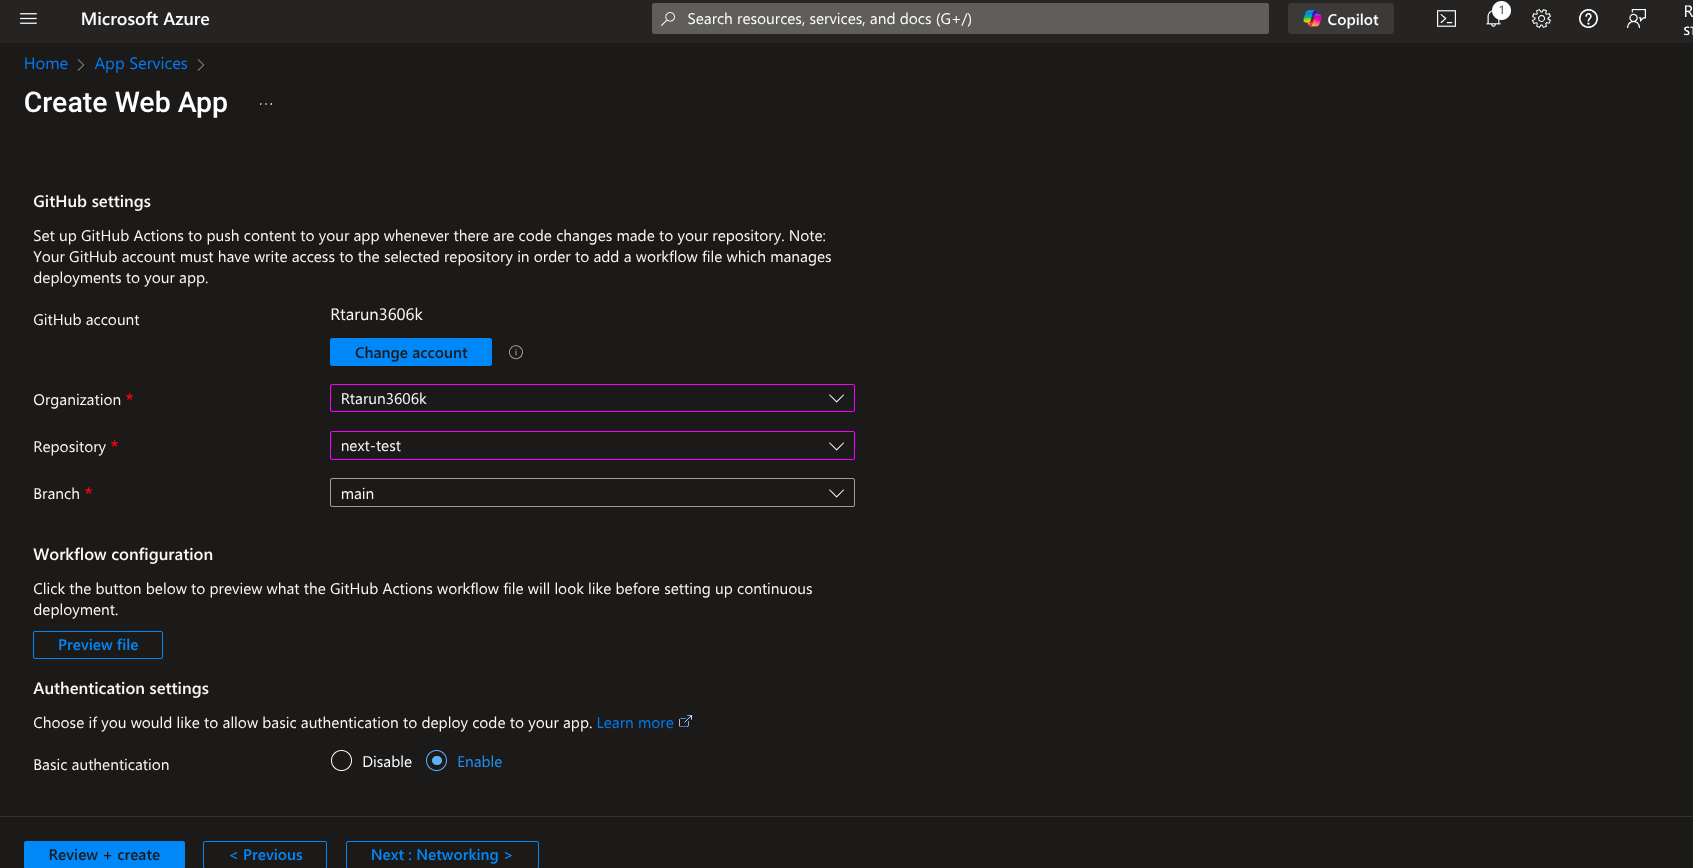
Review + Create
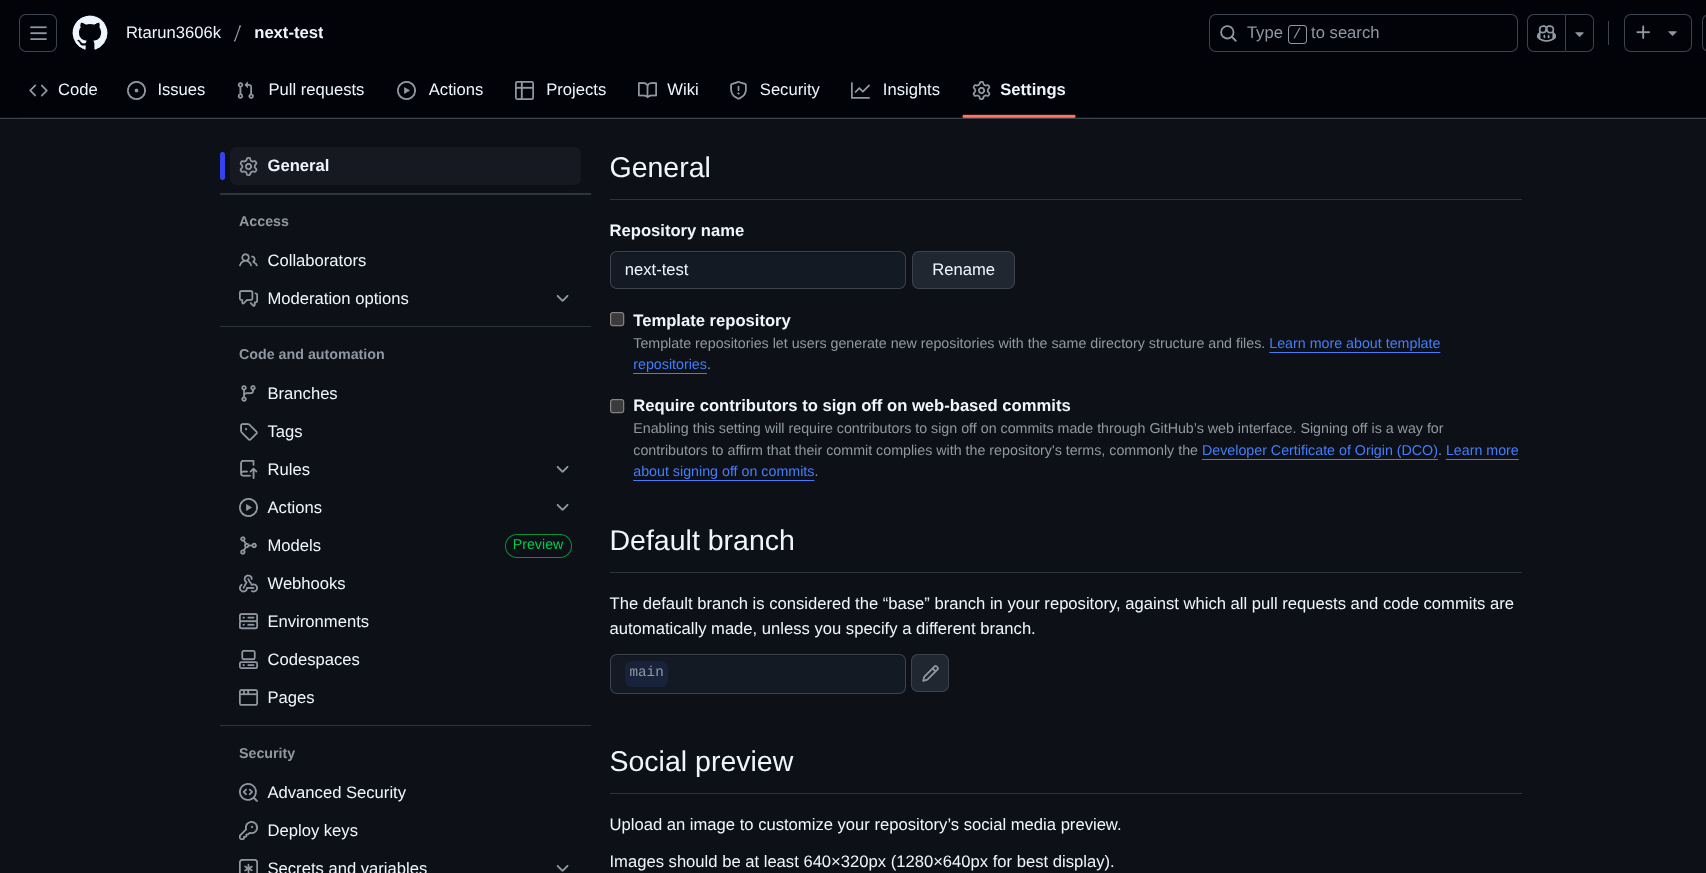
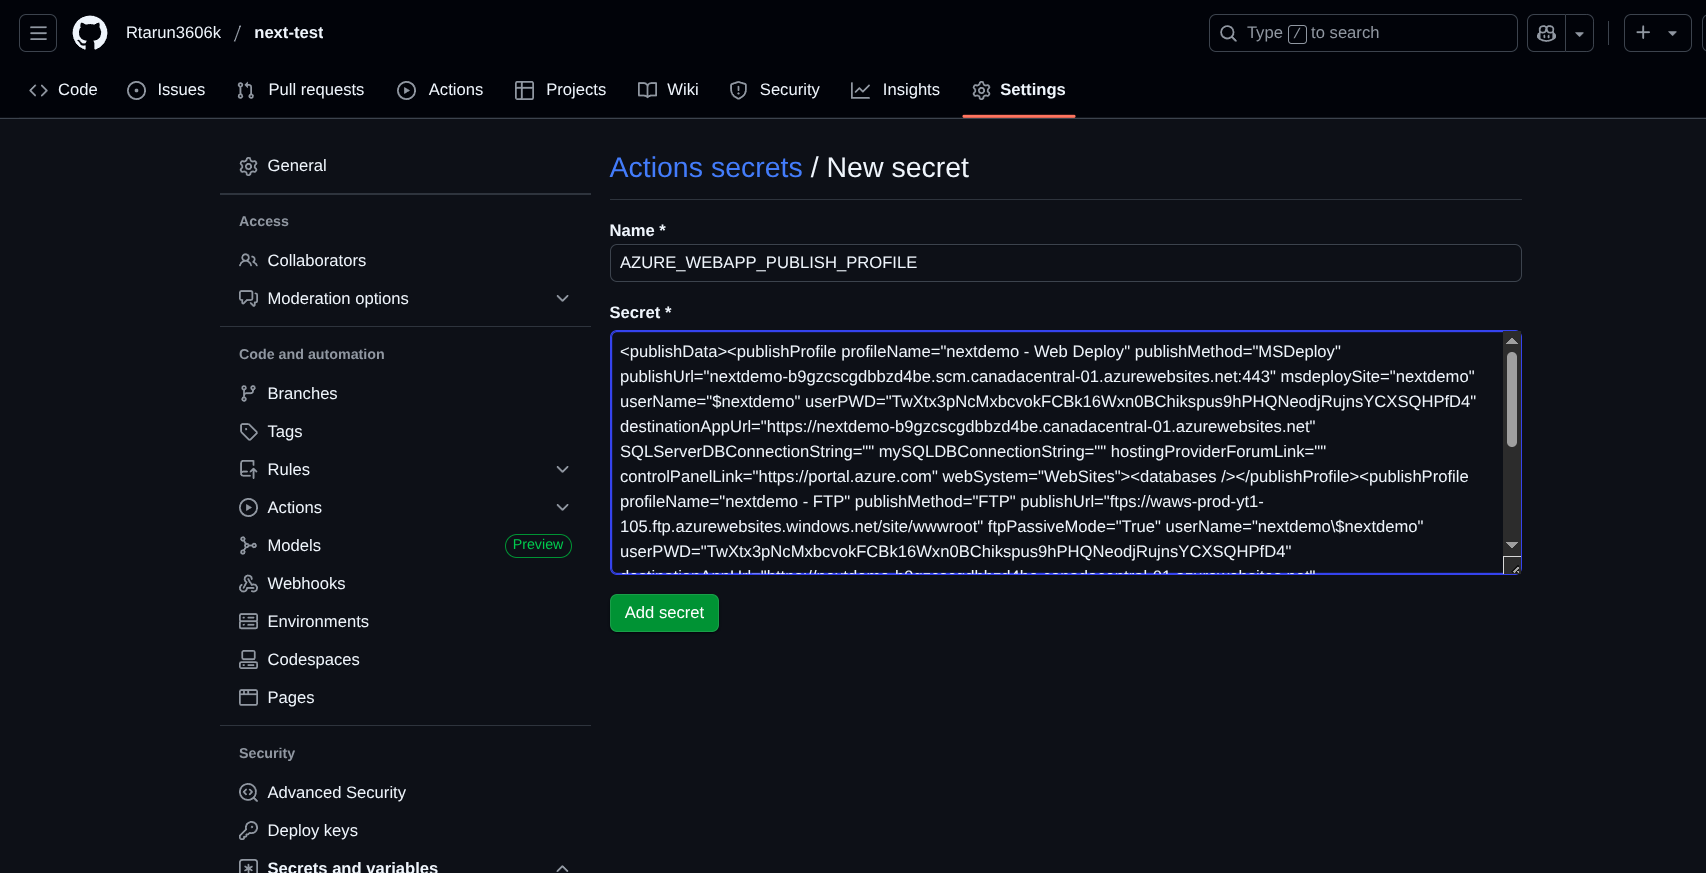
Adding Screts To Github
Go to setting of your project > Screts And variables > Actions
Add your env
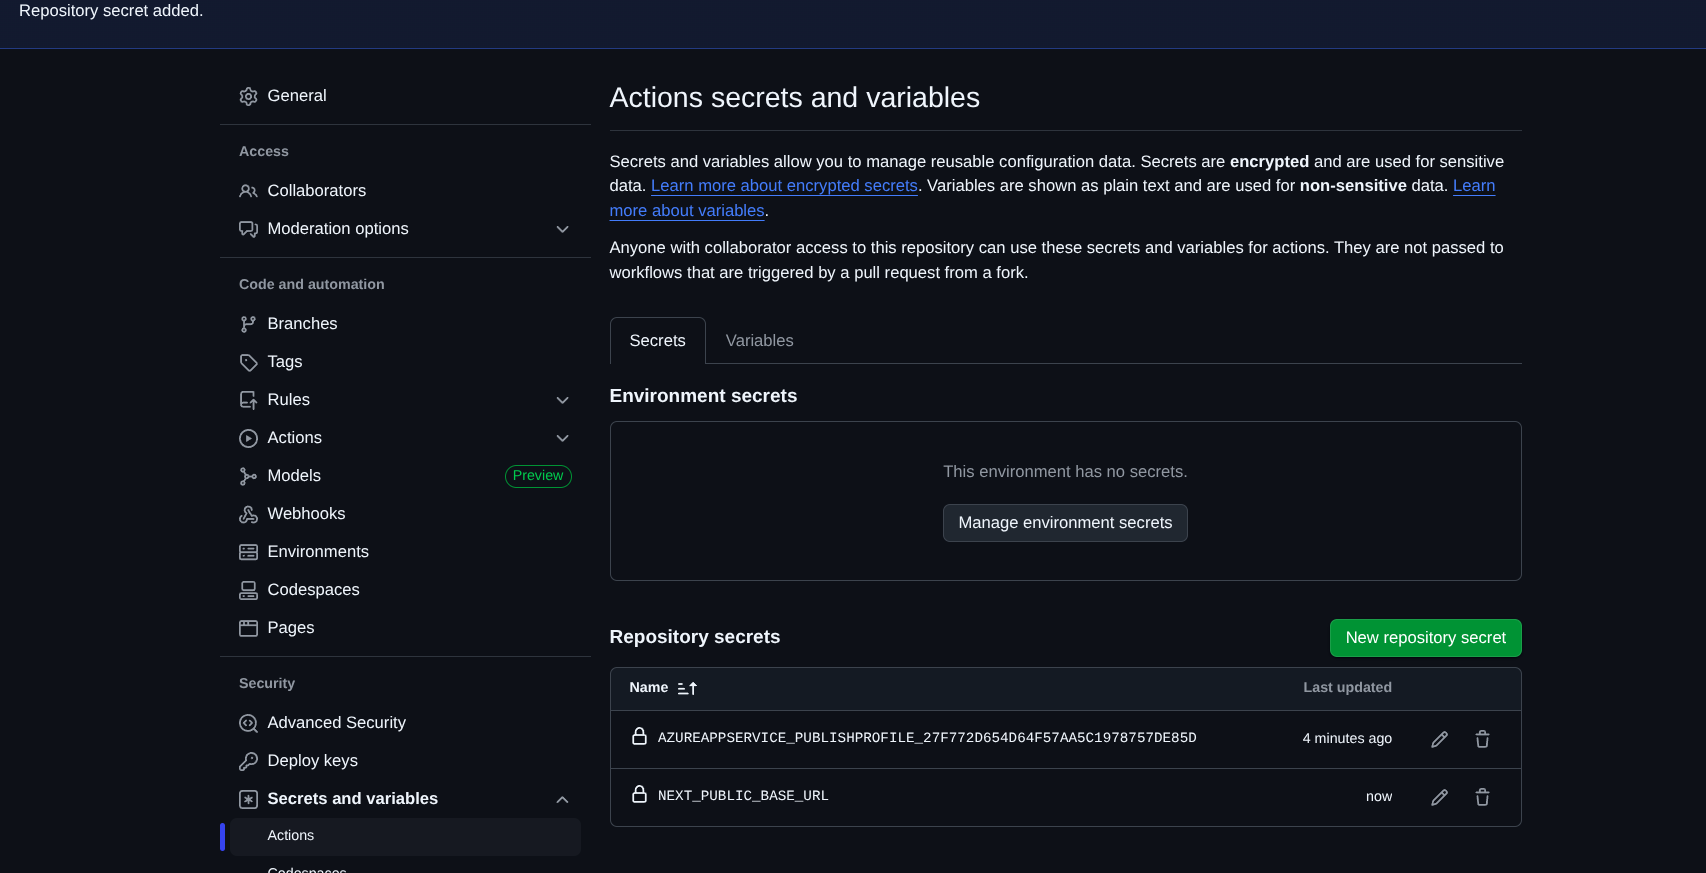
Download you public profile and paste the following secret from the file you downloaded
AZURE_WEBAPP_PUBLISH_PROFILE="XML Content in file"
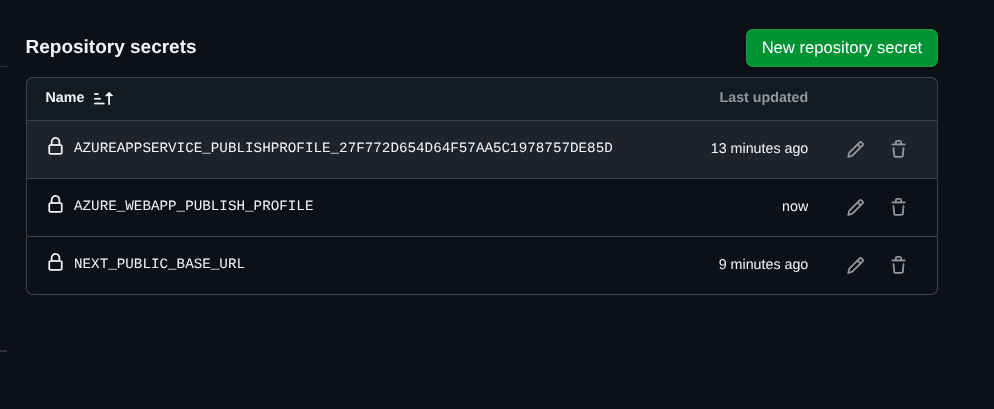
Final Github Secrets should look like
Now Sync your repo you will find .github folder then > main_my_next15_app.yml
chnage the code and then replace it with below
name: Build and deploy Next.js app to Azure Web App

on:
  push:
    branches:
      - main
  workflow_dispatch:

env:
  APPLICATION_PUBLISH_PROFILE: ${{ secrets.AZURE_WEBAPP_PUBLISH_PROFILE }}
  WEBAPP_NAME: "nextdemo"
  NEXT_PUBLIC_BASE_URL: ${{ secrets.NEXT_PUBLIC_BASE_URL }}

jobs:
  build:
    runs-on: ubuntu-latest

    steps:
      - uses: actions/checkout@v4

      - name: Set up Node.js version
        uses: actions/setup-node@v4
        with:
          node-version: "20.x"

      - name: npm install, build, and test

        run: |
          npm install
          npm run build
          mv ./build/static ./build/standalone/build
          mv ./public ./build/standalone

      - name: "Deploy to Azure Web App"
        id: deploy-to-webapp
        uses: azure/webapps-deploy@v3
        with:
          app-name: ${{ env.WEBAPP_NAME }}
          publish-profile: ${{ env.APPLICATION_PUBLISH_PROFILE }}
          package: ./build/standalone
WEBAPP_NAME: "nextdemo"change this to your Azure App service name
Now push your code
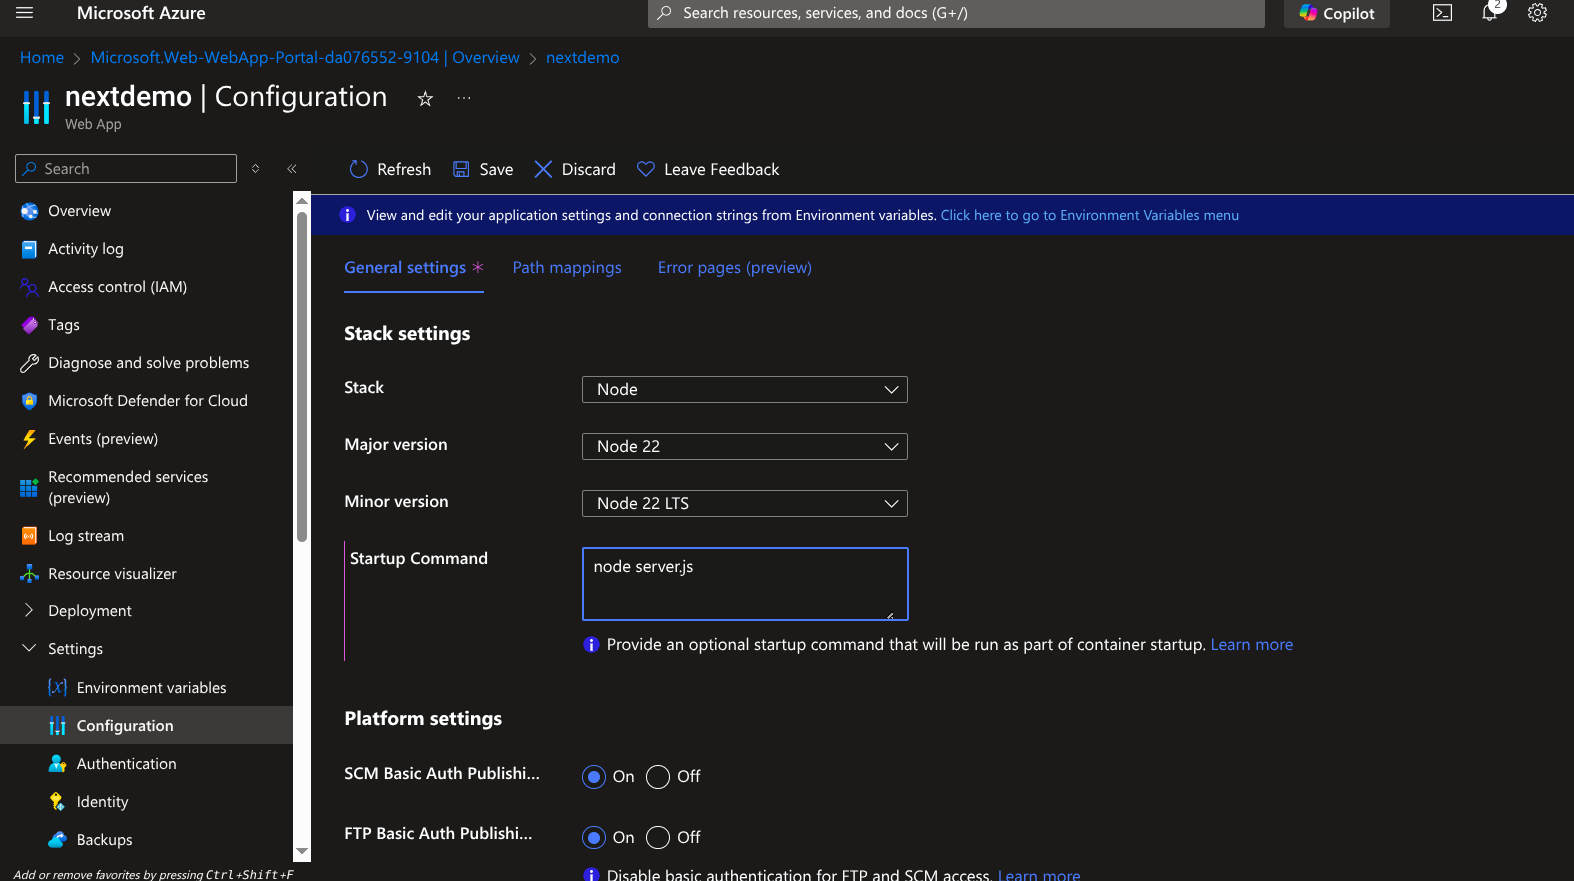
Now Go to your Azure App service > Settings > Configuration then add start up command
node server.js
Now head to your App Overview and click restart after a moment click the link and check your deployed app
Final Result
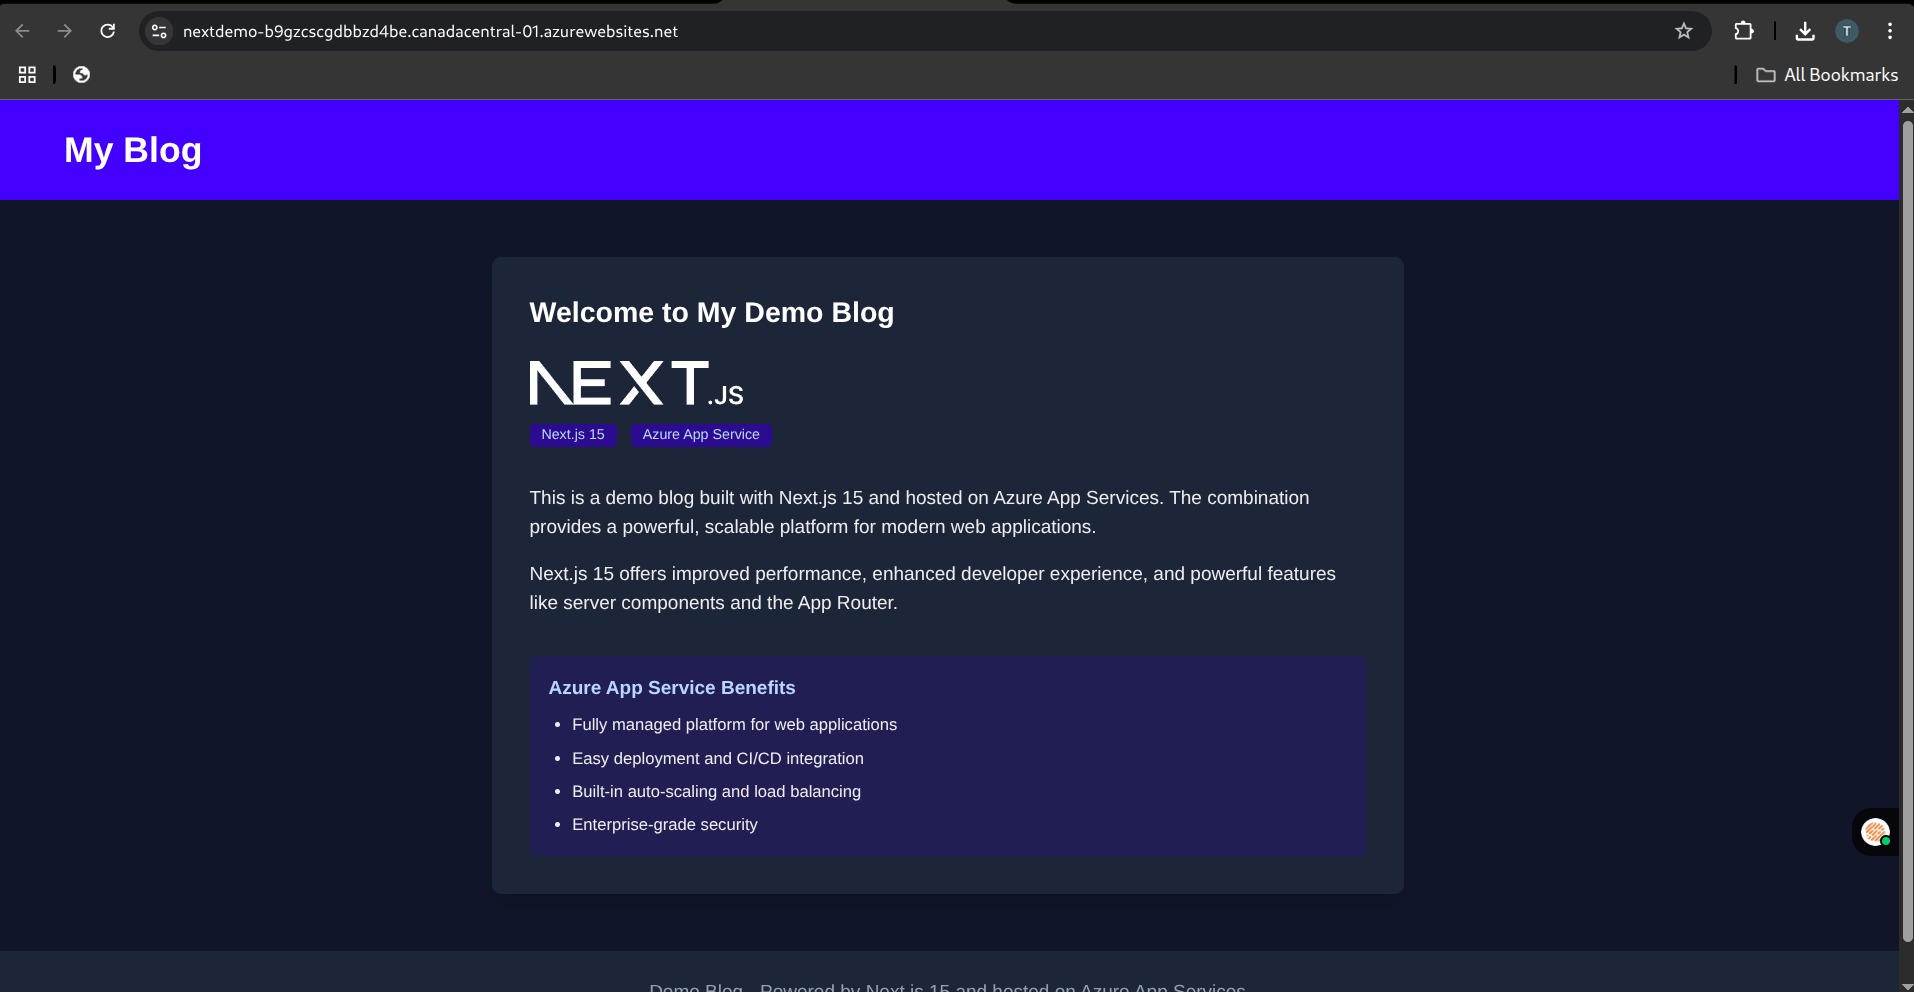
🎉 Success! Once the deployment is successful, visit your Azure App Service URL. You should see your Next.js 15 app live!
Conclusion
Deploying a Next.js 15 application on Azure App Service might not be as straightforward as Vercel, but it offers more flexibility, especially for SSR and backend integrations. By following this guide, you should have a working deployment with CI/CD via GitHub Actions and the power of Azure’s scalable infrastructure.
This blog was written to simplify the process for others like me — developers who prefer or need to use Azure. I hope it saves you time, clears confusion, and gives you confidence in hosting full-featured Next.js apps on Azure.
If this helped you, feel free to share or reach out. Let’s grow together as a community of builders!
🙌 Final Thoughts
While deploying to Azure isn’t as plug-and-play as Vercel, it gives you more control and integrates well with enterprise solutions. This guide should save you hours of trial and error.
🧑🏫 About the Authors
Tarun Nayaka – A Tech Enthusiast and Top Voice Awardee!
Tarun Nayaka, a passionate learner and recipient of the Top Voice accolade in Web Applications and Web Design, is on a journey of mastering technology one challenge at a time. With expertise ranging from web development to AI, Tarun is dedicated to sharing knowledge and empowering communities. Join him in exploring the vast possibilities of the tech world!